.webp)
Construction Chemicals

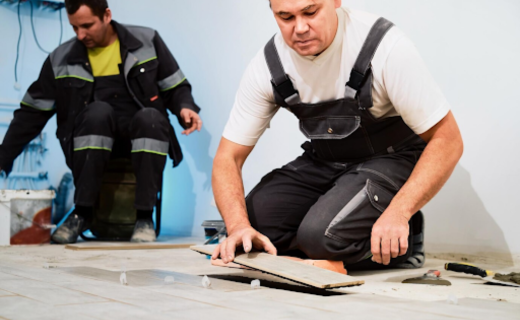
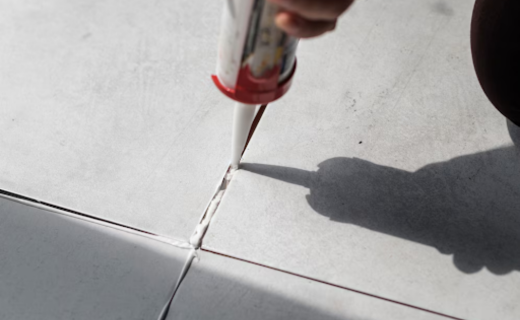
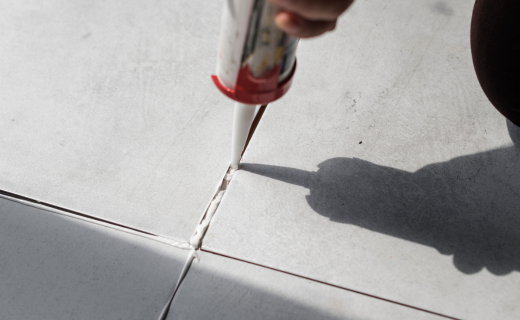
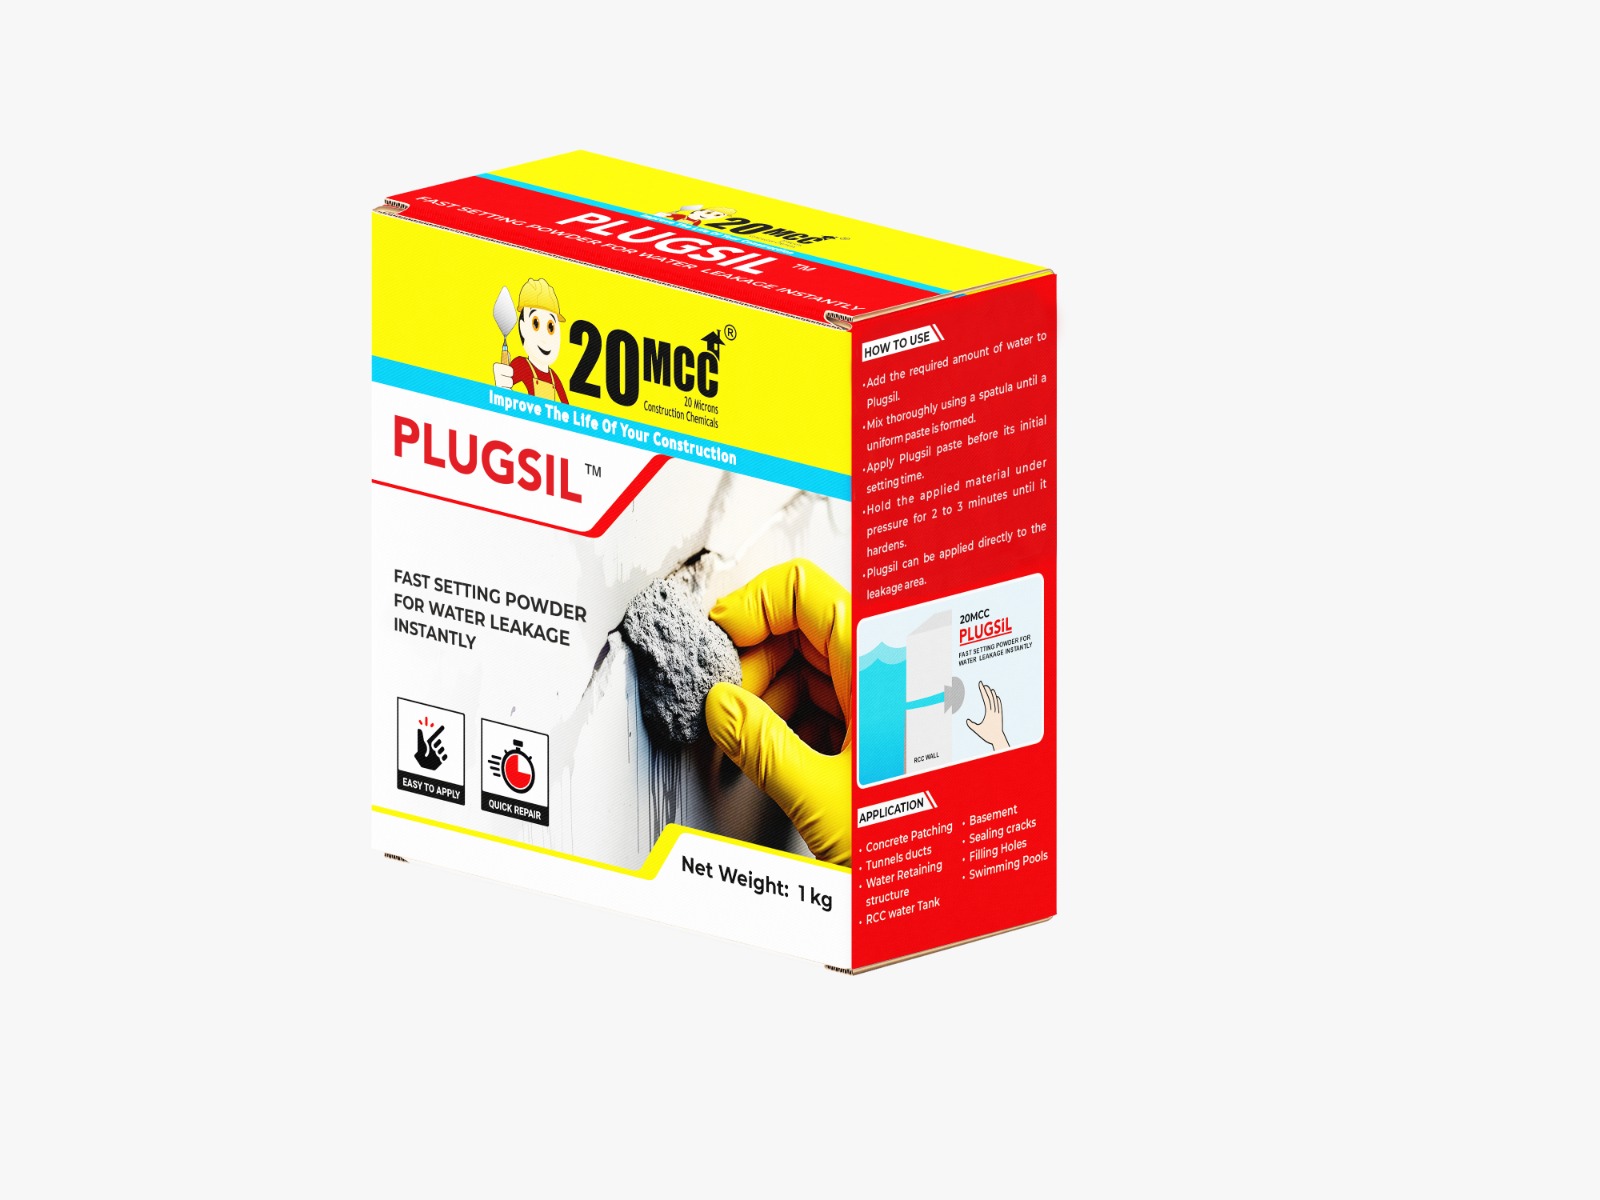
One of the best ways to upgrade a room is the installation of tiles on the floor and walls, adding beauty and style to any area of your house, including the kitchen, bathroom, and living room. However, if we are not careful with our movement or if things were not set properly, tiles can get damaged, become loose, or even get cracked. Also, accidents can damage them. For many, the first reaction to these scenarios is gathering a head as it seems that the tiles can't be repaired. However, finding the best waterproofing services in India and purchasing the most suitable tile adhesive which is further used in the cleaning process can make the repair a hassle-free and work with professional results to be expected. The article shows the way to tile adhesive repair. Tile adhesive is a product that is used to glue tiles to a wall. It is available in different types such as ready to use paste which are directly applied or powdered adhesives that are diluted in water and then used. Tile adhesives have become very versatile in modern days and are used for sticking any surface. The adhesives are strong and have a good grip on the walls and also can be used to guarantee that the tiles are well placed for a long time. So, make sure before you begin with your project that you select a correct adhesive for your specific type of tile which can be ceramic, porcelain or natural stone. Remember that a wrong adhesive could cause you a lot of trouble. If you want to fix the broken tiles one step further, find and prepare the tools and materials that need to be replaced first. Here's everything to be fetched: Adhesive tiles and the right material for its application Replacement tiles (if the damaged ones are beyon Grout (Rainbowsil and Rainbowsil Hardener + Resin) Tile spacers Notched trowel Rubber mallet Tile cutter (optional, for cutting tiles into pieces) Putty knife or chisel Bucket and mixing stick (if a powdered adhesive should be used) Sponge and clean cloth Protective Once, all materials and tools are in place, you can begin the tile fitting process on the wall with these steps: Start this step with examining a tile that needs replacement. The tile may be wobbly, have a crack, or be completely absent. In the case of a mostly unbroken but cracked tile, you can still stick it with glue. When the tile is shattered and gets to pieces or is completely fallen off, it will be necessary to buy a new tile of the same dimensions and color and pattern. Remember the color of the grout and note how much and what is its thickness in order to get a seamless repair. Do the removal of the damaged tile if the situation is such that a new tile is to be placed, without causing any harm to the surrounding tiles. To begin with, take a putty knife and start scraping the edges very gently so that the grout comes off, bit by bit. At this point, do not rush but instead, be patient in order to steer clear of any possible tile-cracking when prying up the tile. Once the grout has been removed, use a knife to slowly push in the tile’s edge to take it out. A rubber mallet can smoothen the tile's removal without going harsh on the surface. The parts of tile, if any, and the glue's stickiness need to be gotten off the surface. For getting the adhesive to do its job well, a spotless surface is highly necessary. You can use a watered sponge with which to remove the dust, debris, and the remaining pieces of old adhesive from the tile bed. Aside from that, make sure the area is free from dust and dry as well. Any dirt that is still left on the surfaces is able to be a reason for the tile adhesion to fall apart, leaving you with a defective tile only too soon. On the occasion of using the powdered tile adhesive, the need to mix becomes vital. Recycling will be required if they still contain residual adhesive or grout or have become deformed. Put the waste tile in a waste container, then get rid of it. Soak the sponge thoroughly so that it is dri-0001. Combine the adhesive with water in a bucket and stir until it reaches a smooth, lump-free consistency, similar to peanut butter. Pre-mixed adhesives eradicate the necessity of mixing and can be used directly from the container. Run the notched trowel across the floor exactly where the tile will be secured. The ridges produced by the notches are arranged precisely and in this way, the adhesive will be definitely effective. If it is just a small repair, then apply the adhesive to the back side of the new tile. A thickness of about 3-5 mm will be enough, it all depends on the size of the tile. Fit the new tile cautiously, matching it with the existing tiles. Push the tile with more strength, so that it definitely sticks to the adhesive. Use tile spacers in order to make the grout lines and the tile sizes be equal and steady. Gently use a rubber mallet to level the tile and push the air pockets out of the tile. The curing of the tile adhesive is complete predominantly within 24 to 48 hours. During this period, avoid stepping on or interfering with the fixed area. Various products and environmental factors affect the curing time of the adhesive. The information on the packaging of the glue should be referred to for specific instructions. When the adhesive is dry, it is appropriate to use the grout to fix the tile. Mix grout, preferably Rainbowsil and Rainbowsil Hardener + Resin, according to the instructions, so that it all blends correctly with the coloring of the old grout. With a grout float, you can apply the grout to the gaps, pressing firmly for adhesion. A piece of damp sponge for wiping away excess grout will not only get rid of the unwanted grout but also not take any out of the joints. Normally, it will take a few hours for the grout to set. 3D one of the designs from the backside of the clothing Dress or put on the attire that you want to get the copy of on a different piece of the fabric and trace along the perimeter of it. After the grout has dried, clean the tile with a dry cloth using circular motions until no grout leftovers are left. For residue, dampen the cloth, although do not put too much water into use. Opt for Best-Quality Materials: It is highly recommended to choose tile adhesive and grout of the highest quality as they not only provide the durability to the tile but also give a professional finish to it. Corresponding Colors and Sizes: A new tile for replacement that is similar to the original tile in the dimensions, pattern, and color is essential to have a consistent covering. Don't Hurry: While the process of work requires removing and attaching the tiles, it is essential to remember that this is a precise process and only the right application of force should be used to avoid any damage. Be Persistent: The tile spacers and the original installation's grout width must be the same to guarantee the ideal neatest appearance. Do Not Skimp on Grouting: The application of a grout sealer like Rainbowsil Filler will help to prevent the water and dirt from the joints and also it will help to prolong the life of the repair project. Conducting the Process in a Hurry: Forgetting to comply with curing time for adhesive and grout will result in their premature failure. Using Too Much Adhesive: If the adhesive put on at the back of the tiles is not pressed down uniformly, some tiles may get higher than the others, and thus, result in the problem of the grout. Surface Uncleaned: The adhesive bond on a dirty surface is weakened leading the repair to be fragile. Simply going along with this guide and our products will cause the desired effect of beauty in tile function to be achieved and that too without a dent in your savings account. A single tile or a small area, it is a lesson we learn from life that good preparation, care, and quality materials that make the difference when one needs to save. Is there any project or work where you need extra protection aside from water-resistant, Indonesia, and innovative construction material products that are made to improve the strength and durability of every project? Ranging from the protection of the concrete structure's integrity to the reinforcement of mortar, and plaster materials, our recommendations are for you. The products listed:How Does Tile Adhesive Work?
Tools and Materials You’ll Need
How to Fix Tiles on Wall
Step 1: Assess the Damage
Step 2: Remove the Damaged Tile
Step 3: Clean the Surface
Step 4: Prepare the Tile Adhesive
Step 5: Application of the Adhesive
Step 6: The Tiles Installation
Step 7: Let the Adhesive to Set
Step 8: Adding Grout
Step 9: Brush and Scour the Floors
Tips for a Successful Tile Repair
Common Mistakes to Avoid
Build Stronger, Last Longer – Choose 20MCC!